1 Add packages to the console?
2 Delete packages from the console?
3 Create a new collection?
4 Add, delete, sort packages on a collection?
5 Uninstall packages from the client?
6 Create a new version of a package?
7 Configure packages?
8 Update mobile units?
9 Add, delete, edit formulas?
10 Send a text message?
11 Execute actions on the mobile unit?
12 Control a mobile unit by Remote Control?
13 Create a dummy unit?
14 Set an install schedule?
15 Sort Mobile Units according to an Arbitrary Criteria?
16 Add Application Shortcuts?
17 Manage Sites?
18 Manage Groups?
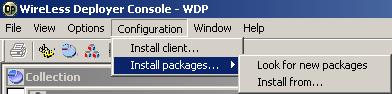
You can add packages to the WireLess Deployer Console through the "Install packages..." option located on the "Configuration" menu:
The "Look for new packages" option automatically searches for new packages to install. If it doesn't find new packages the following message will appear:

The "Install from..." option allows to browse for zip files on your PC.
Example
In the "New" folder (located in "X:\Program Files\WireLessDeployer\New") you have "WTnCE52Cfg88-3-1-5.zip":
In order to add this package, you can browse for it or use the automatic search.
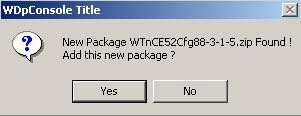
If you use "Look for new packages" option, the following message is displayed:
If you select [NO] the following message is displayed:
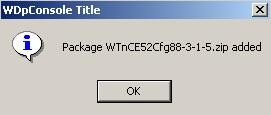
If you select [YES] the following message is displayed (this is the same message that appears after selecting a package using "Install from..." option):
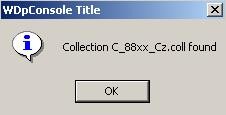
On this case, the package contains a collection (included on the package by default), so the following message will appear:
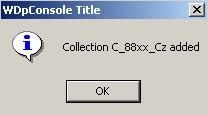
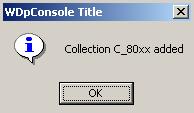
Then, the last message will inform that the collection has been added:
The package was removed from the folder "New", unzipped and added to the collection.
When adding a package that doesn't have any associated collection, the last two messages will not appear. If you want to install that package on a client, you will have to create a collection and add it manually, because packages installation on clients is performed through collections.
In order to delete a package from the console, use [DELETE] button on "Packages" window. This button only eliminates packages from the console, i.e. it DOESN'T delete them from the client (see Uninstall packages from the client). Besides, it only deletes packages that aren't part of any collection.
Go to the "Collection" window and press [NEW]. The following window is displayed:

Enter a Collection ID and press [OK]. For example, if you input "C_80xx", the following message is displayed:
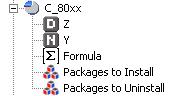
The new collection is added to the list of collections on the left panel of the "Collection" window. Now you are able to configure the collection's data:
|
By default the description is "Z" and the name is "Y". To change those values select the collection and press [EDIT]. If you want to delete the collection press [DELETE]. You can also create a formula (see Add, delete, edit formulas for further information), add packages to the collection (see Add, delete, edit packages on a collection) and define a validity schedule (see Setting an install schedule). After you make all the necessary changes press [APPLY] and the collection will be updated on the console; for the changes to take effect on the units you must Update mobile units. |
|
Go to "Collection" window. Select a collection and press
[EDIT]. Then,
you'll be able to:
Add a package to a collection
Package installation on clients is made through collections,
i.e. it is necessary to add the packages to a collection to be able to install
them on the mobile units.
In order to add a package to a collection go to "Collection" window.
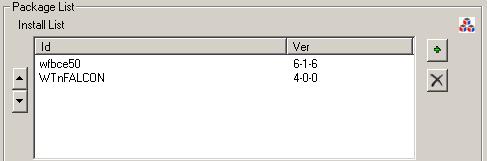
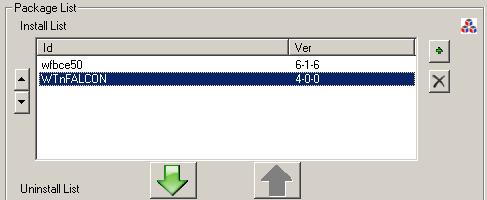
On the right panel there's a frame which contains the "Install List":
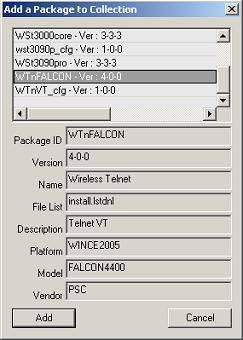
This list contains all the packages associated to a collection that are going to be installed on the client. Press [+] button and the following window will be displayed:
|
|
Select the package you want to add to the collection from the list of available packages. All the information about the package will be displayed on the fields below. Press [ADD] to add the package to the collection or [CANCEL] to cancel the process.
|
If you press [ADD], the package will appear on "Install List":
Press [APPLY] and the collection will be updated. Although the package has been added to the installation list, for the changes to take effect on the units you must Update mobile units.
*Warning*: Deleting a package form a collection doesn't uninstall it from the client. See Uninstall packages from the client.
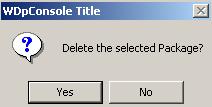
Select the collection you want to delete the package from, then press [EDIT]. All the packages included on the collection will appear on "Install List". Select the package you want to delete and press [-] button. The following message will be displayed:
Press [YES] to confirm the action or [NO] to cancel.
Change package installation order
Package order inside a collection is followed for installation on the client
and allows to manage prerequisites. This order can be modified.
Select the collection which packages you want to sort. All its packages will
appear on "Package List"
frame. Press on [EDIT]
and select the package you want to move. Then use the arrows to modify the
package position on the list.
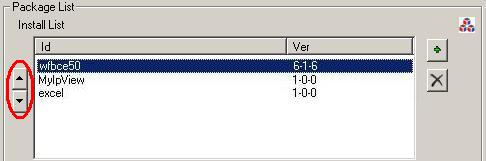
Press [OK] to save changes or [CANCEL] to preserve the data as it was before.
Go to "Collections" window. First, select the
collection that contains the package you want to uninstall. Then, press [EDIT].
Next, select the package from "Install List" and press
![]() .
.
The package will be transferred to "Uninstall List":
Press [APPLY] to confirm changes. Although the package has been added to the uninstallation list, for the changes to take effect on the units you must Update mobile units.
Before making any changes on a package configuration, it is necessary to create a new version of it (except if you are modifying the first version you added to the console). This option applies to "Configuration" packages only, "Application" packages can't be configured.
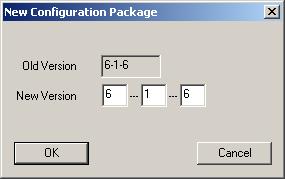
To create a new version of a package, go to "Packages" window. Then, select the configuration you want to modify from the configuration package list and press [NEW VERSION]. This window will appear:
Input new version number and press [OK]. This fields accept only numbers. The new version of the package will appear on the packages list, following the previous version.
Once created the new version of the package, it is possible to modify its configuration files (see Configure packages).
After modifying package configuration, you must:
See Add, delete, sort packages on a collection.
Configuration packages can be modified according to user needs. It is very important to create a new version of the package that is going to be modified before making any changes to its configuration (except when modifying the first version you installed). Changes should be made on the new version (see Create a new version of a package). If you perform changes on the configuration without making a new version previously, they wont be applied.
To modify configuration files, go to the "Packages" window. Select the configuration you want to edit from the left panel and press [CONFIGURE PACKAGE]. The following window will appear:

Select the configuration file you want to edit from the list of configuration files that belong to the selected configuration. Press [SELECT] and the editor corresponding to that type of file will open.
After modifying package configuration, you must:
See Add, delete, sort packages on a collection.
Remember, for the changes to take effect on the units you must Update mobile units.
It is necessary to perform an update for the changes made on the WireLess Deployer Console to be applied to the mobile units.
Mobile units load packages included on those collections:
Unit update can be started from the console or from the mobile unit.
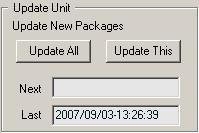
Update from console can be manual or automatic. To perform a manual update, go to "Units" window and press [UPDATE ALL] (updates all units) or [UPDATE THIS] (updates only the selected unit). It is possible to select a Site or a Group for the update to be performed on those units only.
To configure an automatic update, open the configuration file located on Start -> Programs -> WireLess Deployer -> Configuration. This file contains a section called "Agent" that includes "AutoUpdate" option, which must be activated to be able to define the automatic update time (see Agent configuration). When performing an update, WireLess Deployer Agent will verify which collections need to be updated on the units that are being updated. Only active collections inside their validity period will be updated (see Setting an install schedule).
*Warning*: If you select [UPDATE ALL] the update is made in the mobile units that are "On" and associated to WiFi network. Mobile units that are "Off" or not associated to WiFi network will be updated when they get turned on and connected.
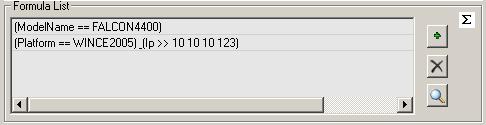
It is mandatory to define a formula for each collection. Otherwise, the packages associated to that collection won't be installed, because the formula defines on which mobile unit/s the packages included on "Install List" will be installed.
Go to the "Collection" window. There's a frame called "Formula List":
Between lines there's an "or" relation (disjunction) and between terms of the formula there's an "and" relation (conjunction).
Select a collection and press [EDIT] button. Then you'll be able to:
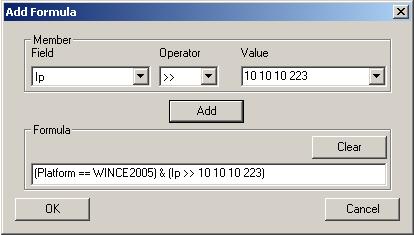
Add a formula
Press the button [+] next to the "Formula List" and the following window will be displayed:
|
|
|
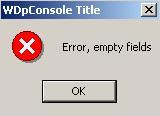
If the field, the operator or the value is missing, the following message is displayed:
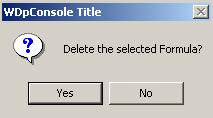
Select the line you want to delete and press on [-] button next to the "Formula List". The following message will appear:
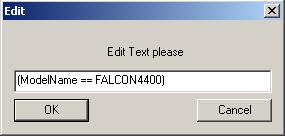
Select the line you want to modify and press on ![]() button
next to the "Formula List". A window
where you'll be able to make all the necessary changes will appear:
button
next to the "Formula List". A window
where you'll be able to make all the necessary changes will appear:
Finally, press [OK] to validate changes or [CANCEL] to cancel the changes.
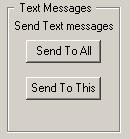
It is possible to send text messages to one mobile unit or all the connected mobile units. To do so, go to "Units" window. There's a frame called "Text Messages".
|
|
Select [SEND TO ALL] to send a message to all units, or [SEND TO THIS] to send a message only to the selected unit. |
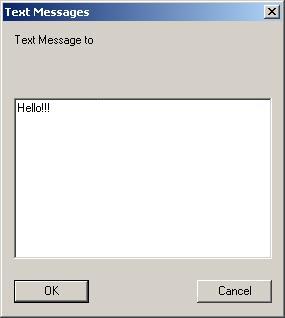
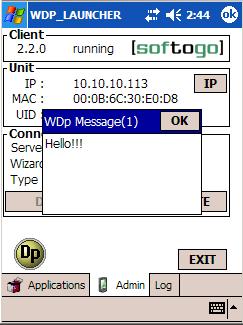
Next, "Text messages" window will appear, where you must type the message you want to send. Then, press [OK] for the message to be sent to the mobile unit/s.
| Console | Client |
|
|
|
WireLess Depoyer allows to execute commands on a mobile unit from the console.
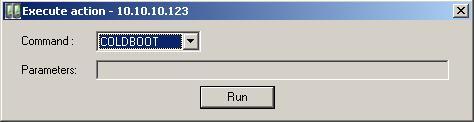
To do so, go to "Units" window and select the unit on which you want to execute an action. Then, press [EXECUTE ACTION]. This window will appear:
"Command" list contains all the available commands:
The data required on "Parameters" depends on the selected command:
Press [RUN] for the action to be executed on the mobile unit.
WireLess Deployer Remote Control enables real time control of the mobile unit. To use the Remote Control you must select the device you want to control on "Units" window -you can only select between green units (connected), in principle. Then, press [REMOTE CONTROL]. This window will open:

On the bottom of the window there's FTP, that displays folders and files. Those who belong to the PC are located at left and those who belong to the PDA are located at right. The panels make easier to find folders and files, and the arrows allow to transfer them from the PC to the terminal or vice versa.
On the top of the window there's VNC viewer (at right) and the process viewer (at left). VNC viewer allows real time visualization and control of the PDA display. The process viewer can be in reduced mode -as on the previous screenshot- which displays the processes running on the unit, battery status, available memory, and storage memory. The arrow button enables to change the process viewer to wide mode:
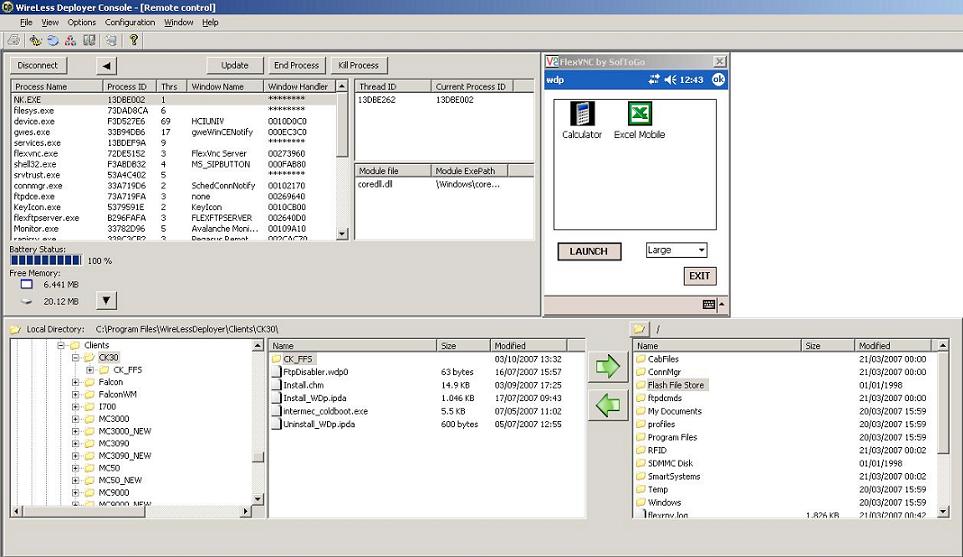
The wide mode shows more information about the current processes. Besides, when selecting a process, it displays the associated thread list and the associated module list.
Right clicking on a process or using the buttons located on the top of the process viewer you can perform the following actions:
See also Remote Control by GPRS.
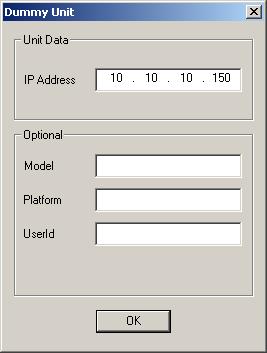
A dummy unit allows to access to a terminal that is out of the net. However, the terminal will not access to the console, so the console will not receive all the information about that terminal on the "Units" window and only a reduced number of actions will be available for it - it is possible to control it by Remote Control, but it is not possible to install packages on it, for example.
|
Only the IP address of the terminal is necessary to create a dummy unit Go to "Units" window and press [CREATE DUMMY UNIT]. A window will open, where you must input the IP of the terminal you want to control. "Model", "Platform" and "User Id" fields are optional. Press [OK] and the dummy unit will appear at the bottom of the unit list of "Units" window. |
|
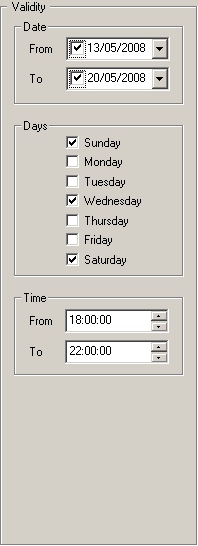
A validity period defines when a collection can be installed. It is not mandatory to define a validity period for each collection but it may be useful to organize user's activity or to delay installation of a software update until the end of the day.
Only one validity period may be defined for each collection (between two dates, selecting only a start date or an ending date or none). Within that period you can select on which days of the week and between which hours it will be valid.
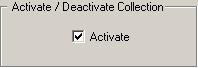
To set up a validity period, go to the "Collections" window. You will find the "Activate/Deactivate Collection" and "Validity" sections.
Activating or deactivating a collection
|
|
|
All three criteria can be combined. In the example, the collection can be installed between 5/13/08 and 5/20/08. Within that period, it can only be installed on Sundays, Wednesdays and Saturdays between 6 p.m. and 10 p.m. |
When finished, click on [APPLY] to validate any changes or [CANCEL] to discard them.
When managing more than a few units, it can be very useful to sort them according to different criteria. Ordering units helps in quickly checking the status of all the units with common characteristics (model, platform, etc).
The WireLess Deployer Console can sort the mobile units using any of these columns:
| Custom Columns (User defined) | Default Columns (defined by WDp) |
|---|---|
|
|
To order all units using any of these columns, click on the column's name. An indicator (an arrow) will show if a column is being used as a sorting criteria (forward or backward).
The console "remembers" the previous order when reordering. This way, units can be ordered according to more than one column, with the last clicked column being the primary criteria.
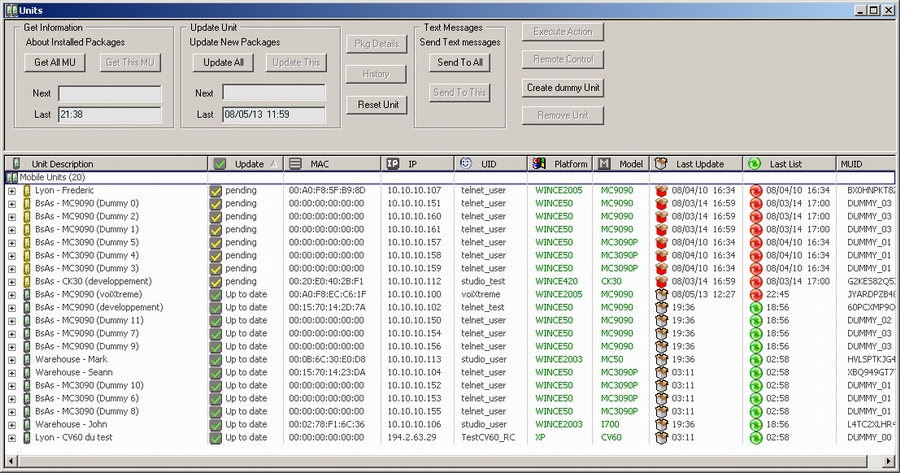
In the example below the units are grouped by update status, then by model and then by IP address. To order the units this way, we have clicked the IP column first, then the model Column and the Update column at last. Notice that this is the exact reverse order of what we wanted.
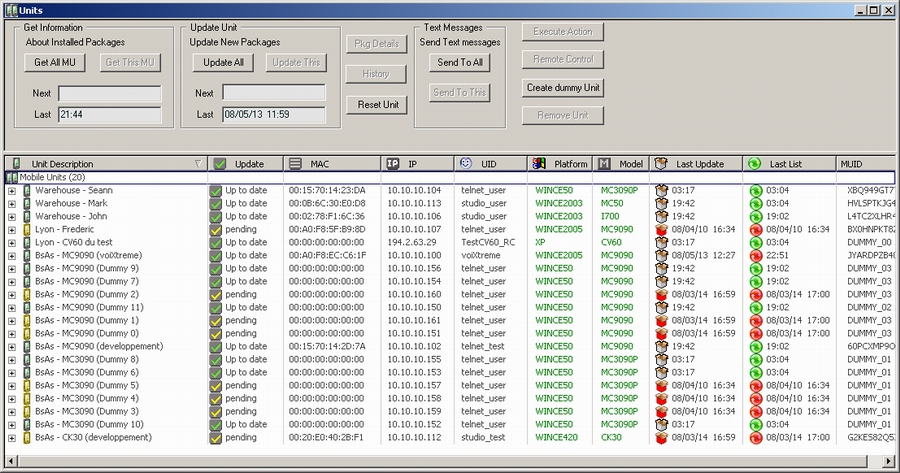
In the next example, we have ordered the units using the unit description as criteria (reverse order). The default unit description is the MAC address, but it can be changed within the WireLess Deployer Console by clicking on the unit's description after selecting that unit first.
WireLess Deployer allows to add shortcuts towards other applications on the
Launcher screen.
Shortcuts are stored under “HKCU\Software\Softogo\wdp\otherapps” key in the registry.
This group of entries composes each shortcut:
STARTEXEnn
Complete path to the application
NAMExnn
Application’s name
VERSIONnn
Application’s version
Optional
ARGSnn
Command line arguments
Optional
Where “nn” is a two-digit number that represents an index for the shortcut. The launcher supports up to eight shortcuts, this means the index starts from “00” and ends to “07”.
This is a .reg file to add two shortcuts:
[HKEY_CURRENT_USER\Software\Softogo\wdp\otherapps]
"STARTEXE00"="\windows\WTnCE.exe"
"NAME00"="WTNCE"
"VERSION00"="1-0-0"
"ARGS00"=""
"STARTEXE01"="\windows\calc.exe"
"NAME01"="Calculator"
"VERSION01"="1-2-3"
"ARGS01"=""
You have an example in:
http://www.sof2go.net/dnl/wdp/zips/uti/Launcher_shortcuts-1-0-2.zip
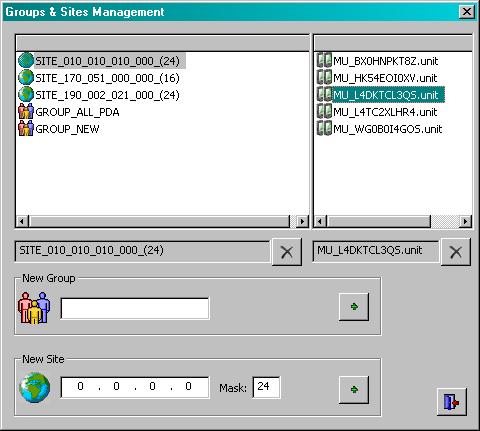
Go to "Units" window and click on [SITES/GROUPS] button. It will open a window that shows a list of sites and groups on the left panel and the list of units associated to the selected group on the right panel:
Sites can be created manually or automatically (if a new subnet is detected).
To create a site, input the IP address of the subnet (just the relevant part)
and the bit number of the subnet mask, then click on [+]. The prefix
"SITE_" will be added to the address.
24= 255.255.255.0
16= 255.255.0.0
8= 255.0.0.0
The units will be automatically added to the new site according to their IP address.
In order to erase a site (and all its content), select it and click on the [X].
*Warning*: Deleting a site doesn't delete the units from the system, it just erases their link to the site that has been deleted.
Groups must be manually created, except for GROUP_NEW, which contains the units that have been recently connected to the system.
In order to create a group, go to "Units" window and click on [SITES/GROUPS] button, "Sites & Groups Management" window will open. Input a name on "New Group" field and press on [+]. The prefix "GROUP_" will be added to it.
In order to erase a group (and all its content), select it and click on the [X].
*Warning*: Deleting a group doesn't delete the units from the system, it just erases their link to the group that has been deleted.
Unit association to a group must be performed manually, except for the case of GROUP_NEW that is automatic.
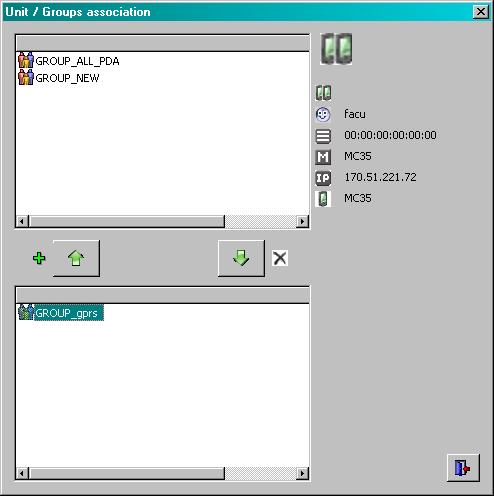
To associate a unit to a group, select the unit and click on [ASSOCIATE] button.
On the left panel, there's information
about the selected unit.
On the top frame, there's the list of groups the unit belongs to.
On the bottom frame, there's the list of groups the unit doesn't belong to.
In order to associate the unit to a group, select the group from the bottom
frame and click on the arrow that points up [+].
If you want to remove a unit from a group, select the group you want to remove
the unit from and press on the arrow that points down [X].