Chapter I \ Chapter
III
Administrator's
Guide
Chapter II.- Installation
1 Installing WireLess
Deployer on the PC
2 License
3 Configuring and installing the WireLess
Deployer Client
1 Installing WireLess Deployer
on the PC
Download the package from the site and execute it on line or save it on your
hard disk to use it later.
The WireLess Deployer installation Wizard will guide you through the
installation process.
2 License
WireLess Deployer requires a license number. Without license, you can use
the application in demo mode, which allows to connect only one terminal.
|
In order to use WireLess Deployer with many
users you must request for a license. Go to "Start -> Programs -> WireLess
Deployer -> License Request".
The following window will appear:
To get more than one licence, click on [ >> ] button
to get an available one.
It is possible to set up to 10 licenses.
|

|
|
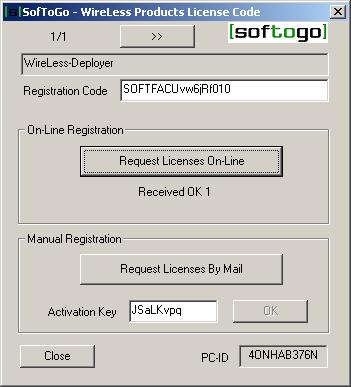
There are two registration modes: on-line or
by e-mail.
On-line registration: Type your Registration Code on
"Registration Code" field. The Registration Code is a number you
are furnished with when purchasing the product. After typing your
Registration Code press on [Request License On-Line]. If you get
an "Activation Key", your license has been activated.
|
|
|
If you enter an invalid code, an error
message will appear, indicating that there was a mistake on the license
request process.
|

|
|
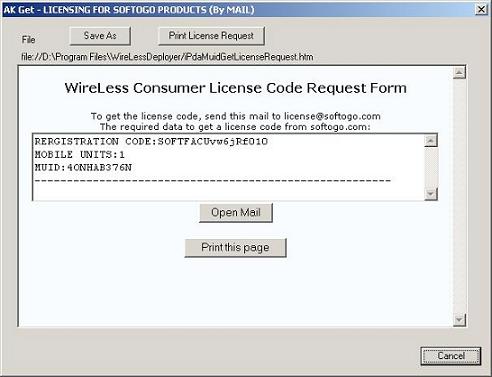
E-mail registration: After typing your
Registration Code, press on [Request License by eMail]. A form
containing all the necessary data for the license request will appear. DO
NOT MODIFY THIS FORM.
Press on [Open Mail] to send the form to license@softogo.com.
[Print this Page] button allows to print the information.
|
|
|
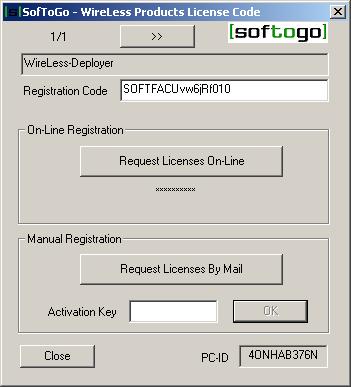
You will receive an Activation Key. Type it
on "Activation Key" field and press on
[OK] to
validate your new license.
|
|
3 Configuring and installing the WireLess Deployer Client
Open the WireLess Deployer Console. Go to "Configuration"
menu and select "Install client" option:

Another window called "Terminal Clients" appears. On this window you will see a list of available clients
with
their platform, model and vendor.
Please check that the
version displayed in the unit information matches with the platform of the terminal.
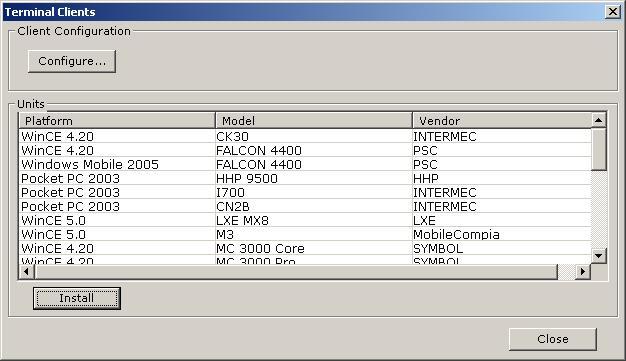
*Warning*: The client must be configured before
installation.
Select a client from the list and click on [CONFIGURE]. Then IniEditor will open and will allow you to customize the client
configuration. IniEditor is a program that displays all the configuration
options with a complete description and allows to activate or deactivate
them.
*Warning*: Every time you modify the client configuration you must
install it again.
After configuring the client you can proceed to its
installation.
WireLess Deployer Client installation requires iPDA and
Active Sync utilities. iPDA is automatically installed with the WireLess
Deployer package. Active Sync can be downloaded from Active
Sync Official Site. See iPDA/ActiveSync.
To install the client, connect the terminal to the desktop
and verify if ActiveSync is connected. Then, select the corresponding client
and press [INSTALL]
button. An installation page will open, where you'll just have to follow
the indications to complete the installation procedure.
Before installation procedure, a dialog where you can
configure the user ID will open, so you can keep the same configuration for
several units.

If the installation is successful, you can finally launch
WireLess Deployer on the PDA.
Contents \ Chapter
I \ Chapter III