Wireless Deployer/Symphony Remote Control is a stand alone application that allows the user to control a mobile unit.
User's Guide
- Network Diagrams
Wireless Deployer Console: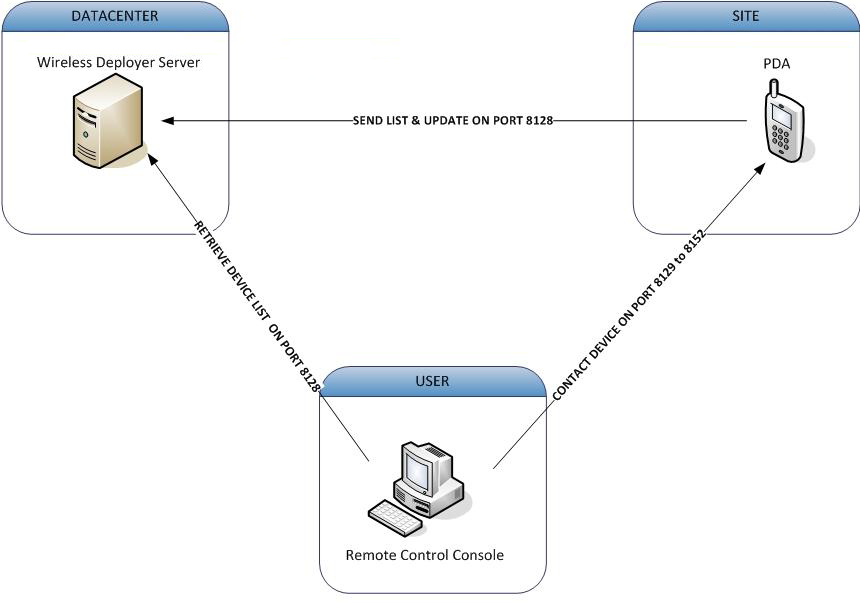
Symphony Console: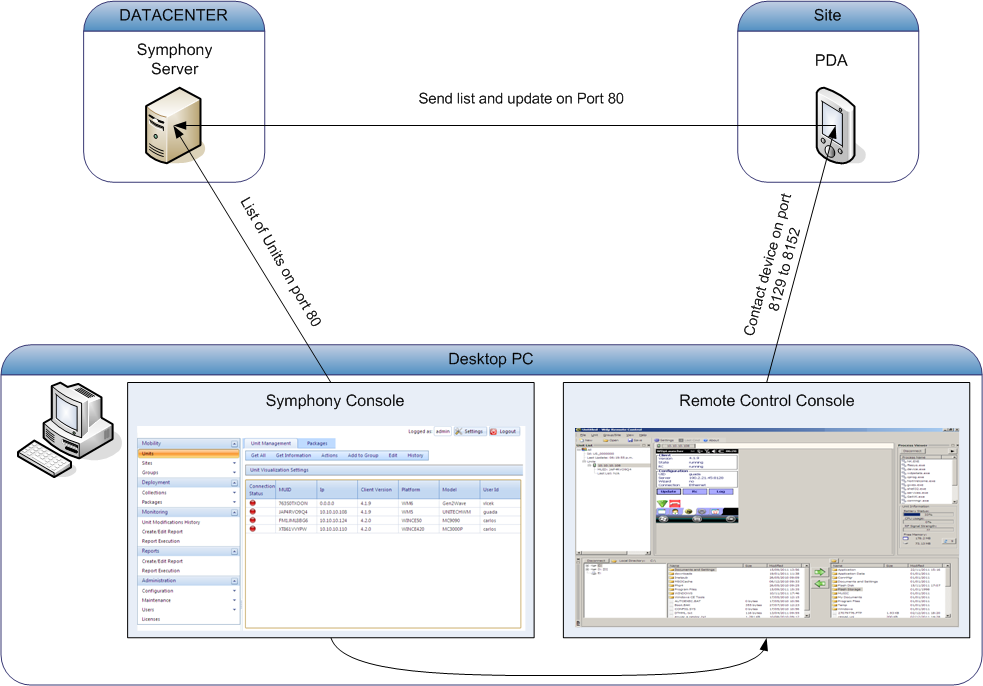
- Download
- Register
the Console
After performing the license purchase, you should have received a PDF file that contains, at the end of the first page, an alphanumeric registration code of 16 characters, to which the purchase is associated.
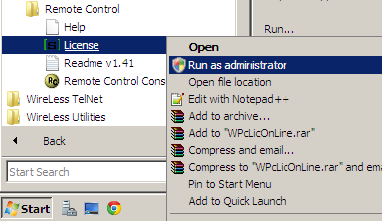
To work with more users you need a license, to request one go to the “License” shortcut on the Remote Control folder on the start menu.
The following window will appear: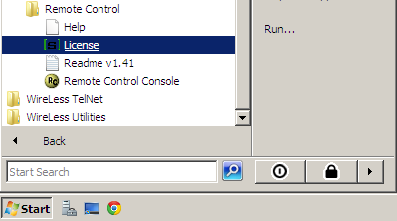
NOTE: We highly recommend to run the application as Administrator to avoid troubles, you can do it making a right click on the icon.
You can use the online registration mode to get a license or if you don't have a internet connection on the system that you have the console you can use the Manual Registration.
- Online Registration:
Type your Code on "Registration Code" field. The Registration Code is a number you are furnished with when purchasing the product. After typing it press on "Request License On-Line". If you get an "Activation Key", your license has been activated and you will see this screen: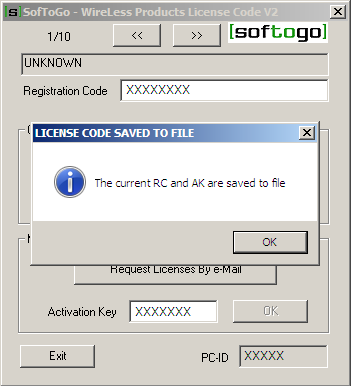
- Manual Registration:
- Checking the Licenses:
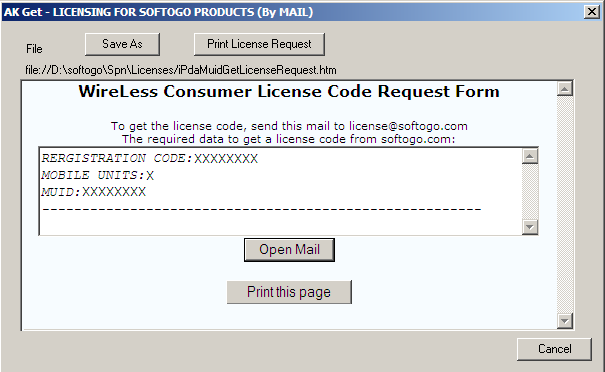
You will have to send the form to license@softogo.com , you can use the button "Open Mail" to open a window with your mail program or copy the information and send it by yourself.
"Print this Page" button allows to print the information.
You will receive an Activation Key. Type it on "Activation Key" field and press on "OK" to validate your new license.
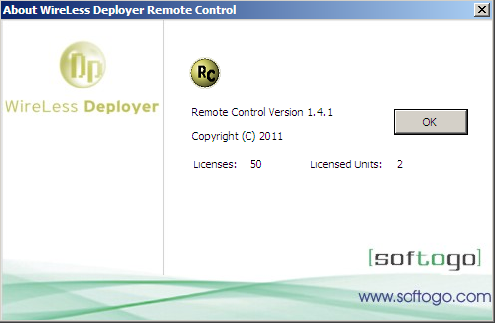
To be sure that Remote Control have been registered properly and the licenses are working, go to the Remote Control Console from the Start .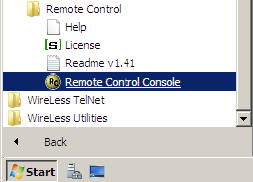
On the main screen select the menu Help and Choose the option “About Remote Control”.
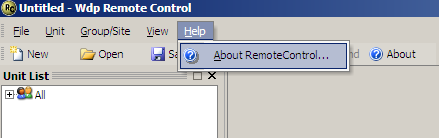
A window will appear with the licenses information.
- Online Registration:
-
Unit Status
 Licensed: This means that the
unit was identified and has a license assigned. The user can connect to this unit.
Licensed: This means that the
unit was identified and has a license assigned. The user can connect to this unit. Disabled: The unit was identified but there is no
more licenses available. The user can't connect to this unit.
Disabled: The unit was identified but there is no
more licenses available. The user can't connect to this unit. Unknown: The unit is not identified or doesn't
have a license assigned. The user can connect to this unit.
Unknown: The unit is not identified or doesn't
have a license assigned. The user can connect to this unit.
-
Adding a Unit
-
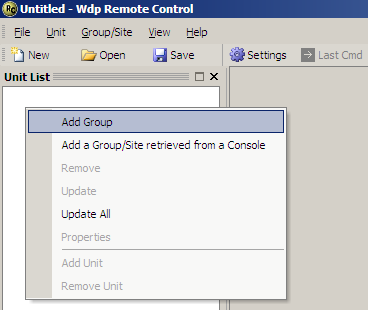
Adding a Group
-
Retrieving Groups and Sites from a WireLess Deployer/Symphony Agent
- If you are using the Wireless Deployer Console:
- If you are using the Symphony Console:
-
Updating a Unit
-
Updating a Site/Group
-
Updating a Site/Group periodically
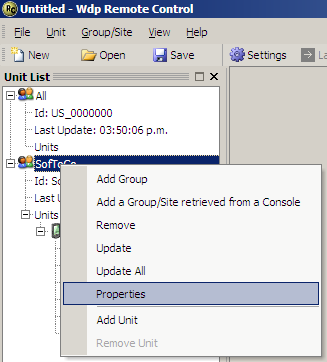
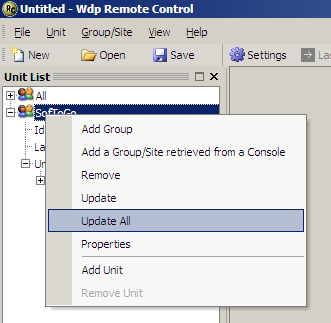
You can setup the Remote Control Console to update a
group or a site periodically. Select a group/site, make a right click
and select the option Properties.
Wireless Deployer
Download the file "WireLess Deployer - Remote Control" from the SofToGo website.
http://www.softogo.com/com/en/download/Deployer.html
Symphony
Download the file "Symphony - Remote Control"
from the SofToGo website.
http://www.softogo.com/com/en/download/Spn.html
Each unit has three possible states:
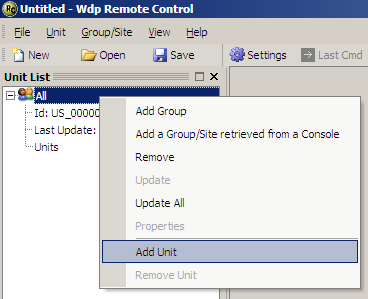
To add a new unit, select the Group icon and the menu Add Unit
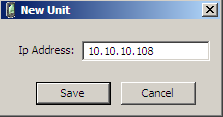
A dialog will be open and the IP Address of a new unit can be inserted. Then press Save.
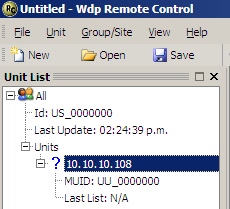
A new unit should appear on the unit list:
On the Unit List select the menu Add Group
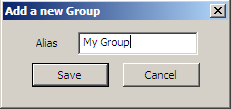
Enter the Group alias and press Save
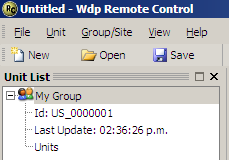
A new group should appear on the unit list:
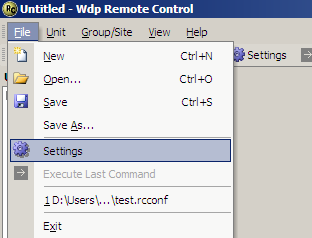
The first is step is configure the current project loaded. In order to do this, select the menu File->Settings
Enter the host name, the port, the password of the
WireLess Deployer Agent, select the option Connect to "WireLess
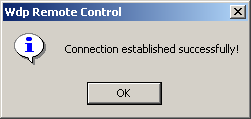
Deployer Console" on the radio button and press Test Connection.

If the parameters are correct and the connection is established correctly. The remote control shows the following message, press "OK" and you will be back to the Settings Window, click on "Save".
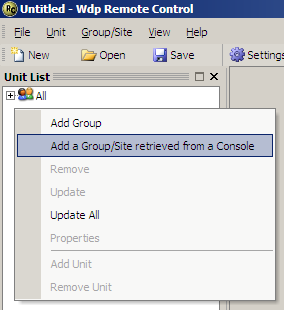
In the Unit List select the menu Add Group/Site from retrieved from a Console
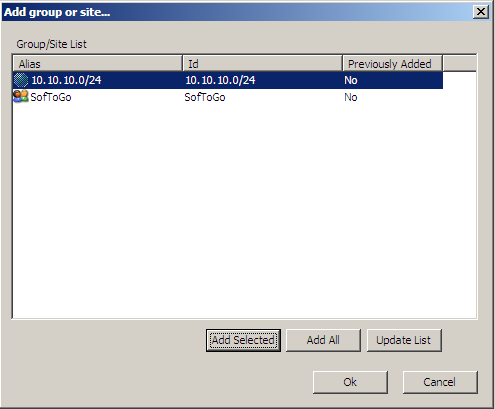
Symphony Console:
Once the dialog is opened. A list of Groups/Sites will be displayed. Select a Site/Group and press the Add Selected Button. Then press the Ok button.
Wireless Deployer Console:
Once the dialog is opened. A list of Groups/Sites will be displayed. Select a Site/Group, type it's password and press the Add Selected Button. Then press the Ok button.
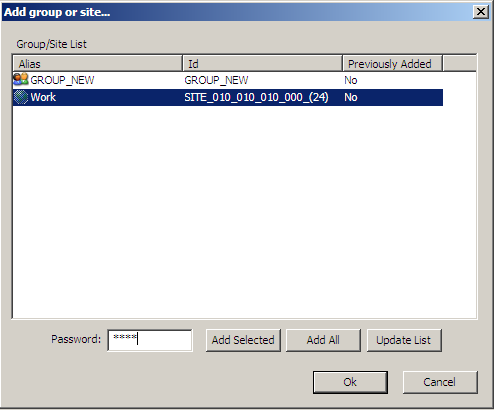
Note: If the password is wrong a message will tell you that the operation couldn't be completed, you can change the password selecting the group and making a right click on it, choose the option Properties.
On the access settings you will be able to type the password of the group, after that click on Save.
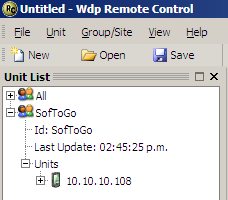
The site should appear in the Unit List
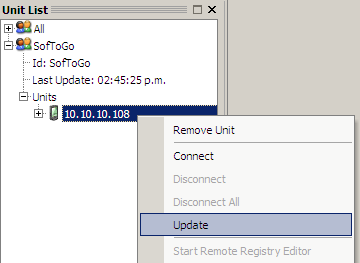
Only identified units belonging to an identified Site/Group can be updated. To update a unit, select the unit and the menu Update
Only identified Sites/Groups can be updated. To update a Site/Group, select it and the menu Update All
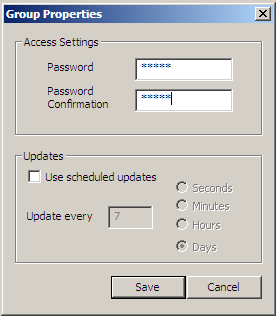
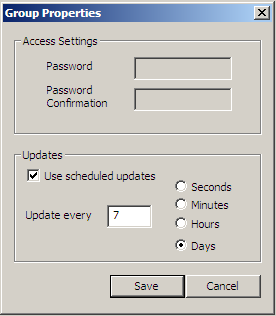
A new window will open, to activate the automatic updates check the box "Use scheduled updates" and then select when you want to program the updates.
The user can choose the list of attributes that will be retrieved for each unit when a Site/Group is retrieved or when a specific unit is updated. To choose the unit's attributes select the menu File -> Settings
The list of attribute retrieved can be modified by selecting a new attribute on the left list and pressing the right arrow button. Remember that retrieving more attributes for each unit will delay the update process for each unit

Visit our site www.softogo.com. Contact us sales@softogo.com